Hello friends!
I'm up on the TGF blog today and I'm excited to be sharing a card using the newest
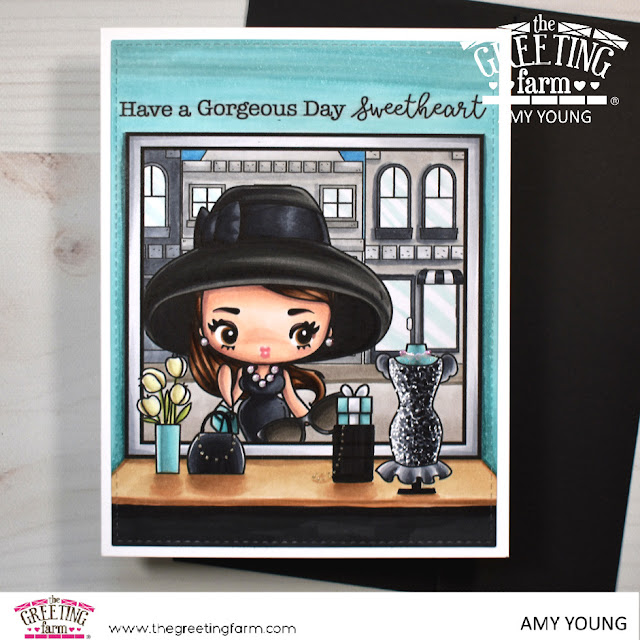
digital stamp set called Breakfast at Cheeky's which is now available
in the TGF store!
This sleek and stylish Cheeky comes with extra accessory images that
can easily be layered on, like her hat, a couple pairs of glasses and a
champagne flute, to dress her up even more. You will also find two great
sentiments and a sweet little cat as well.
Oh,
and if you are wondering how I was able to give a digital Cheeky pink
lips I first printed out my scene on regular, thin computer paper,
grabbed a sheet of Copic X-Press It and layered it over the print out so
I could see the image beneath, then used a small piece of masking paper
over the space where the lips would print. That way once I ran my Copic
X-Press It through the printer I could simply peel off the masking
paper with the black lips leaving an empty space on her face, layered
the two print outs again and used an R43 Copic marker to trace the lips
back in. Sure, it's a little extra effort but worth it if you like to
add some colorful lipstick to these beauties. ;)
Ta ta for now!
Supply list:
cardstock- Papertrey Ink and Copic X-Press It
digital stamps- The Greeting Farm (Breakfast at Cheeky's set, Store Fronts set and Cheeky Shop set)
My Favorite Things A2 stitched rectangle stax set 2
Sharpie extra fine white pen
Wink of Stella clear glitter pen
Sakura stardust glitter pen
Nuvo dream drops
Copic markers:
skin- E000, E00, E11, E04, R00, R20, RV11, R43
hair- E23, E57, E49
eyes- E34, E35
clothes- T5, T6, T7, T8, T10, 110, W4, W5, W7, W10, C5, C7, C8, C10, 100, N3, N6, N10
window display- Y0000, Y000, E81, E84, YG21, YG05, G24, G94, BG11, BG53, BG72, BG75, E31, E33, E34, E44, 100
buildings/street- B12, BG10, C1, C2, C3, C4, C5, C6, C7, C8, C9, C10, 100, W2, W3, W4, W5


1 comments:
Very nice card!
Post a Comment